
Manual handling in aged care means any task where a worker uses force to lift, lower, push, pull, carry, move, or support a person or object, especially during transfers, repositioning, and mobility assistance. These tasks happen dozens of times each shift: bed-to-chair transfers, toileting assistance, showering support, repositioning residents up the bed, and recovering from falls. Each movement carries risk. Research shows that musculoskeletal disorders (MSDs) account for approximately 68% of serious injury claims in Australia’s healthcare sector, with back and shoulder strains dominating the statistics. The problem isn’t just one ‘bad lift’. It’s the accumulation of forceful tasks, awkward spaces, time pressure, and unpredictable resident movement across a shift, a week, a year. This guide provides Queensland aged care workers, facility managers, and WHS coordinators with evidence-based transfer methods, equipment selection rules, and a practical framework for choosing HLTWHS005 manual handling training that actually builds competency.

What Manual Handling Is and Why It Matters in Aged Care
Manual handling in aged care is any task where you use force to move, support, or stabilise a resident or load during care activities. This includes bed-to-chair transfers, chair-to-toilet movements, repositioning in bed, pushing wheelchairs, moving beds or trolleys, and assisting residents who have fallen. The definition sounds simple. The reality is complex.
Aged care environments create unique risk. Residents vary in mobility, cognition, and cooperation from one moment to the next. A resident who could weight-bear yesterday may struggle today. Bathrooms are tight. Time is short. Equipment isn’t always within reach. These factors combine to make aged care one of Australia’s highest-risk sectors for manual handling injuries.
Why does this matter beyond compliance? Because the injuries are real and they’re cumulative. Community and personal service workers recorded 19.2 serious claims per thousand employees in Australia during 2020-21. Lower back pain, shoulder strains, and neck injuries plague the workforce. Staff leave. Quality of care suffers. The cycle repeats.
Manual handling injuries in care settings are rarely caused by one ‘bad lift’. They are usually caused by repeated exposures, time pressure, awkward environments, and not using the right equipment early.
Understanding safe manual handling techniques starts with recognising the daily tasks that contribute to injury: lifting legs onto a bed, supporting a resident to stand from a low chair, turning someone in bed without a slide sheet, pushing a manual wheelchair uphill, or moving furniture to clear a path. Each task applies force to your body. Do it safely once and you’re fine. Do it incorrectly thirty times a shift and tissue damage accumulates.
The goal isn’t to stop caring for residents. It’s to change how we deliver care so workers can sustain their health across a career. That shift requires understanding risk, using equipment, and proving competency through structured training like HLTWHS005.
Legal Duties and WHS Expectations in Australia and Queensland
Workers must follow safe systems. Organisations must provide them. That’s the foundation of workplace health and safety law in Queensland and across Australia. But what does ‘reasonably practicable’ look like when you’re helping someone transfer to the toilet at 2am?
A hazardous manual task is a manual handling activity that creates a risk of musculoskeletal injury because it involves high or sudden force, awkward or sustained postures, repetition, or unpredictable movement (such as an assisted transfer). If a task meets these criteria, the person conducting a business or undertaking (PCBU) must eliminate the hazard or, if that’s not possible, minimise the risk through control measures.
The hierarchy of controls applies directly to aged care. Elimination means designing tasks so lifting isn’t needed, like encouraging a resident to move independently with grab rails and adjusted furniture heights. Substitution and engineering controls include hoists, ceiling lifts, slide sheets, and adjustable bed heights. Administrative controls cover rostering, task rotation, and training. Personal protective equipment is the last line, often limited to supportive footwear and gloves.
| Hazard | Control (Best First) | Example in Aged Care | Evidence/Notes |
| Lifting resident from bed to chair | Engineering (hoist or stand-assist) | Use mobile hoist with appropriate sling | Lifting devices reduce back loading significantly |
| Repositioning up the bed | Engineering (slide sheet + bed height adjustment) | Lower bed, use two-person assist with slide sheet | Reduces friction and force required |
| Repeated transfers during shift | Administrative (task rotation) | Rotate staff between high-load and lower-load tasks | Prevents accumulated strain in same muscle groups |
| Low chair height causing deep squat | Engineering (chair height adjustment or replacement) | Provide chairs with seat height at 100-120% of resident’s lower leg length | Optimal seat height improves transfer performance |
Compliance is not just ‘doing a course’. It is proving that hazards were identified, controls were implemented (like hoists and bed height adjustments), and staff were trained and assessed as competent. Incident and near-miss reporting feed this system. When a worker reports shoulder pain after a difficult transfer, that’s data. When a hoist attachment fails during use, that’s a near-miss. These reports should trigger reviews: Was the right equipment available? Was the worker trained on that sling type? Did the care plan reflect current resident ability?
Systematic reviews show that training interventions alone may not prevent lower back pain without broader controls. This evidence supports a layered approach: change the environment, provide equipment, design safer tasks, and then train staff to use those systems correctly. For more on workplace safety frameworks, see what HSE means in practice.
The Aged Care Manual Handling Risk Assessment (A Repeatable 60-Second Method)
The safest transfer is the one you plan. If you cannot clearly state the method, equipment, and roles before you start, stop and reassess. Every transfer in aged care should begin with a quick, structured risk check. This isn’t a lengthy paperwork exercise. It’s a mental checklist that takes under a minute and can prevent hours of pain.
The 60-Second SAFE Check: Scan the resident, assess the task, fix the environment, equip yourself.
A manual handling risk assessment is a quick process to identify what could cause injury during a task (resident, environment, equipment, and worker factors) and choose controls before you start moving.
Resident Factors
Can the resident weight-bear reliably? Can they follow instructions? Are they in pain? Do they have cognitive impairment that makes movement unpredictable? Check for attachments like catheters, oxygen tubing, or IV lines that could snag. Assess skin integrity if using slings. Note any recent behaviour changes or agitation that might affect cooperation.
Task Factors
What distance are you moving the resident? Is it uphill, downhill, or across a level surface? How often does this transfer happen today? Is there urgency (toileting, distress)? Will the movement be predictable or could it change mid-transfer?
Environment Factors
Is there enough space around the bed, chair, or toilet? Are floors dry and clear of clutter? Is lighting adequate? Are bed and chair heights appropriate, or will you need to adjust them? Can you lock all wheels and brakes?
Control Selection
Pick the least risky method first. Encourage independence where possible. Adjust bed and chair heights. Use slide sheets for repositioning. Choose stand-assist devices for cooperative, weight-bearing residents. Use hoists when weight-bearing is unreliable or movement is unpredictable. If the task feels like a ‘big heave’ or if you’re unsure, escalate to mechanical aids.
| Resident Can Weight-Bear? | Can Follow Instructions? | Recommended Method | Required Staffing | Equipment |
| Yes | Yes | Encourage independent movement or stand-pivot assist | 1-2 staff for supervision/safety | Walking frame, grab rails, transfer belt (if used by workplace) |
| Partial | Yes | Stand-assist device or two-person assist | 2 staff | Stand-assist hoist or stable transfer aid |
| Partial | No | Mobile or ceiling hoist | 2 staff minimum (per workplace policy) | Hoist with appropriate sling |
| No | Yes or No | Hoist (full-body sling) | 2 staff minimum | Mobile or ceiling hoist, correct sling type |
Feasibility studies show that structured risk assessment programs improve observed competency. In one trial, physical risk assessment completion jumped from 46% to 85% after implementing a clear, repeatable framework. This demonstrates that giving workers a simple, practical tool changes behaviour on the floor.
Supervisors play a key role in ensuring controls are available and used. For more on workplace safety oversight, see WHS responsibilities in aged care settings.
Core Principles (Biomechanics, No-Lift Thinking, and Why Equipment Beats Technique Alone)
Myth: Good posture fixes manual handling risk.
Reality: Risk reduction comes from eliminating or engineering out high loads. Posture helps, but it can’t compensate for a task that’s inherently high-force or awkward.
‘No-lift’ is a safety approach where workers avoid manually lifting residents and instead use equipment and task design to minimise force and awkward postures. This philosophy recognises that the human spine has limits. Lifting a 70kg person from a low surface, even with ‘perfect’ technique, still loads your back. Do it twenty times a shift and the damage accumulates.
Biomechanical Basics That Matter
Keep loads close to your body. The further a load is from your centre of mass, the more strain on your spine. Move your feet instead of twisting. Pivot steps reduce torsional stress on your lower back. Maintain a neutral spine position (natural curves, not flexed or hyper-extended). Use a stable base of support with feet shoulder-width apart.
These principles apply. But they’re not enough on their own.
Micro-Adjustments in Aged Care
Bed height should be mid-thigh when you’re standing beside it for most tasks. This reduces bending and reaching. Chair seat height matters too. Studies show that transfer performance improves when seated heights are around 100% to 120% of the resident’s lower leg length. Remove obstacles before you start (side tables, footstools, clutter). Lock all brakes on beds, chairs, and wheelchairs.
These adjustments reduce the physical demand of each task. They’re engineering controls applied at the micro level.
In aged care, the most reliable way to prevent manual handling injuries is to reduce the force required, usually by changing the environment or using the right device, not by trying to ‘lift better’.
Evidence-based guidelines confirm that patient lifting devices are highly effective in minimising back loading. Training and advice alone are unlikely to produce long-term reductions in low back load. Equipment works. Training supports its correct use. The two must go together.
| Common Task | High-Risk Movement | Better Setup | Best Equipment |
| Reposition up the bed | Pulling resident’s shoulders while bed is raised | Lower bed, remove pillows, use slide sheet | Slide sheet + two-person assist (coordinated pull on sheet, not resident) |
| Bed to chair transfer | Lifting resident from sitting with arms under armpits | Adjust bed and chair heights to same level, clear path | Stand-pivot assist or mobile hoist (depending on resident ability) |
| Toileting transfer | Bending deeply in cramped bathroom | Use raised toilet seat, clear space, stable grab rails | Stand-assist device or commode chair at appropriate height |
| Shower transfer | Holding resident upright while they step over threshold | Use level-access shower, non-slip mat, shower chair | Shower chair with brakes, ceiling hoist if available |
Understanding the link between manual handling and musculoskeletal injury helps workers recognise early warning signs. For more on injury types and treatment, see soft tissue injuries in workplace contexts.
Safe Transfer Techniques Step-by-Step (Bed, Chair, Toilet, In-Bed Repositioning)
Always follow your organisation’s care plans and equipment manufacturer instructions. This guide provides general best-practice structure aligned with Australian aged care contexts.
A safe transfer is a planned movement of a resident from one surface to another using the least-force method, clear communication, and appropriate equipment.
Sit-to-Stand Assist (Resident Can Weight-Bear)
Setup: Check chair height. Feet should be flat on floor with knees at 90 degrees or slightly higher. Ensure resident is wearing supportive, non-slip footwear. Position yourself to one side (not directly in front). Lock chair or wheelchair brakes.
Cueing: Explain each step. “We’re going to stand up together. I’ll count to three. On three, push up with your legs.” Give the resident time to process.
Execution: Count down clearly. “One, two, three, stand.” The resident pushes with their legs. You provide balance support, not lifting force. Avoid pulling on arms or shoulders. If the resident cannot stand smoothly, stop. Reassess. Consider using a stand-assist device or hoist instead.
Stand-Pivot Transfer (Bed to Chair)
Positioning: Place chair at 45-degree angle to bed, close enough that pivot is minimal. Adjust bed height so resident’s feet are flat on floor when sitting on edge of bed. Lock all wheels.
Pivot steps: Resident stands (as above). You guide their movement by supporting at the hips or using a transfer belt. Small steps, turning towards the chair. No twisting through your spine. Move your feet.
Controlled descent: As resident sits, bend your knees. Do not bend at the waist. Let the resident lower under control. Check they’re seated safely before releasing support.
Chair to Toilet or Commode
Privacy matters. So does urgency. Toileting transfers often involve time pressure. Prepare the space first.
Space and safety: Clear the path. Dry wet floors. Position commode or wheelchair close to toilet. Lock brakes. Use grab rails where available.
Clothing management: Adjust clothing before transfer to reduce time spent standing or balancing. This reduces pressure on both resident and worker.
Tight spaces: Bathrooms are cramped. If you cannot position yourself safely to assist, use equipment. A stand-assist device or hoist is safer than contorting your body in a doorway.
Repositioning Up the Bed
This task injures more workers than almost any other in aged care. Do it with equipment or don’t do it.
Bed height and angle: Lower the bed to working height (mid-thigh). Flatten the head-of-bed angle if safe to do so. Remove pillows temporarily.
Slide sheet use: Place slide sheet under resident (this may require rolling resident side to side first). Two workers, one on each side of bed. Grip the slide sheet, not the resident’s shoulders or arms.
Team coordination: Agree who will lead. Leader counts. “Ready, one, two, three, slide.” Both workers pull the sheet towards the head of the bed in one smooth motion. The sheet slides over the bottom sheet, reducing friction.
Avoid shoulder pull: Never pull a resident by their shoulders or under their armpits. This strains your back and can injure the resident’s shoulders.
Stop Triggers During Any Transfer
If the resident reports pain, dizziness, or sudden weakness, stop immediately. If agitation or confusion increases mid-transfer, pause and reassess. If equipment feels unstable or you hear unusual sounds (creaking, popping), stop. Switch to a hoist if needed. It’s better to restart safely than push through and cause injury.
| Transfer Checklist | Tick When Complete |
| Resident readiness checked (pain, continence, mood, understanding) | ☐ |
| Environment prepared (space cleared, floor dry, lighting adequate) | ☐ |
| Equipment selected and inspected (brakes locked, sling correct size, hoist charged) | ☐ |
| Staffing confirmed (roles clear, both staff ready) | ☐ |
| Communication script agreed (“ready, one, two, three…”) | ☐ |
| Post-transfer checks completed (resident comfort, skin integrity, attachments secure) | ☐ |
Before any stand-pivot transfer, set the environment first. Lock brakes, clear the path, adjust heights, and agree on the count. Then move as one. For more on workplace preparedness beyond transfers, see first aid kit requirements that support injury response in aged care settings.
Hoists in Aged Care (Types, Selection, Sling Basics, Pre-Lift Safety Checks)
If you’re unsure about sling type, fit, or compatibility, stop and get a competent person to check. This is a safety-critical principle.
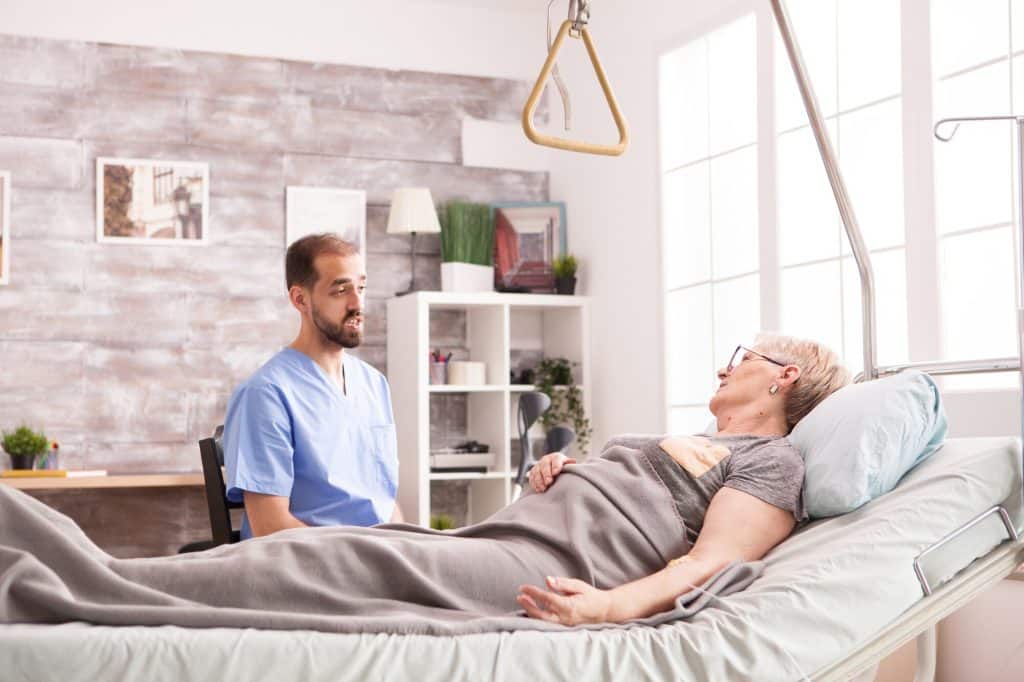
A hoist is a mechanical lifting device designed to transfer a person with minimal manual force, reducing strain on workers and improving transfer control.
Hoist Types and When to Use Them
Mobile floor hoist: Wheeled device with a spreader bar and sling. Best for transfers where ceiling hoists aren’t available. Suitable for bed-to-chair, chair-to-commode, and floor recovery (if resident is assessed as appropriate for hoisting). Not ideal for very tight spaces.
Ceiling hoist: Mounted on ceiling track. Covers specific zones (bedroom, bathroom). Smoothest, most controlled lifts. Ideal for frequent transfers in fixed locations. Requires permanent installation. Follow manufacturer’s safe working load (SWL) and track maintenance schedules.
Sit-to-stand or standing hoist: Supports residents who can partially weight-bear. Resident stands on foot platform, leans against support pad. Good for toileting and short transfers. Not for residents who cannot reliably stand or follow instructions.
| Hoist Type | Best Use Cases | Minimum Staffing | Common Mistakes to Avoid |
| Mobile floor hoist | Bed-to-chair, floor recovery, locations without ceiling hoists | 2 staff (one controls hoist, one supports resident) | Not checking battery charge before use; base too narrow or wide for space |
| Ceiling hoist | Bedroom and bathroom transfers, frequent lifts in fixed locations | 1-2 staff (check workplace policy) | Not inspecting track and sling attachment points; exceeding SWL |
| Sit-to-stand hoist | Toileting, short transfers for cooperative residents who can weight-bear | 1-2 staff (resident must be able to follow instructions) | Using with residents who cannot reliably stand; poor knee or foot positioning |
Sling Considerations
Sling size must match the resident. Too small and it’s uncomfortable, unsafe. Too large and the resident may slip through. Check manufacturer sizing charts, usually based on weight and sometimes height or chest measurement.
Loop selection (short, medium, long) determines how upright the resident sits during the lift. Shorter loops = more upright. Longer loops = more reclined. Follow care plan recommendations.
Toileting slings have an open base to allow access. Amputee and bariatric slings exist for specific needs. Never guess. If you’re unsure, ask a senior staff member or equipment supplier. Some facilities colour-code slings by size for quick identification.
Check sling integrity before every use. Look for frayed fabric, damaged stitching, bent or worn loops, and stains or contamination that suggest it needs laundering or replacing.
Pre-Lift Safety Check
Equipment condition. Inspect hoist frame, wheels, spreader bar, and control pendant. Check battery level on mobile hoists. Verify SWL rating matches or exceeds resident weight.
Sling integrity and fit. Confirm sling type is correct for the task. Attach loops symmetrically to spreader bar. Ensure sling is positioned correctly under resident (support under thighs, back, and head if needed).
Environment clearance. Remove obstacles in the path. Ensure floor is dry. Lock bed or chair brakes (depending on facility policy; some facilities unlock brakes during hoisting to allow slight movement, others keep them locked).
Team roles. Agree who controls the hoist and who supports the resident. Resident briefing: explain what will happen, reassure them, and ask them to remain still if possible.
Post-transfer checks: Once the resident is lowered into the chair or bed, check pressure areas, ask about pain or dizziness, ensure safe positioning, and remove sling if it’s not a ‘leave-in’ type.
A hoist transfer should feel slow, controlled, and predictable. Rushing a hoist is one of the fastest ways to turn a safe method into a near-miss.
Lifting devices reduce back loading and are preferred controls. Research shows that lift-assist devices can reduce caregiver muscle activity compared with manual transfers. This evidence supports prioritising hoists over manual team lifts whenever feasible. For more on workplace safety codes related to equipment use, see first aid code guidance.
Team Lifts and Two-Person Assists (When Appropriate and When Not)
Two people does not automatically make a lift safe, especially with unpredictable resident movement.
A team lift is a coordinated manual handling task where two or more workers move a load together using agreed roles, timing, and communication to reduce individual strain and improve control.
Appropriate Scenarios
Short repositioning with slide sheets (up the bed, side-to-side turns). The load is distributed, friction is reduced, and movement is controlled. Assisting a cooperative weight-bearing resident during a stand-pivot transfer. One worker provides balance support, the other manages the wheelchair or walker. Stabilising equipment, IV stands, or oxygen tubing during a transfer. Guided standing transfer when the care plan explicitly permits and both workers are trained on the specific method.
Inappropriate Scenarios
Lifting a resident from the floor manually after a fall. This is high-force, awkward, and unpredictable. Use a hoist or air-assist device per workplace policy. Unpredictable movement. If the resident may suddenly bear down, pull away, or lose balance, a hoist provides better control. Significant weight or height mismatch between workers. One worker will bear more load, increasing injury risk. Cramped environment where both workers cannot position themselves safely. When a hoist is available and the resident’s care plan recommends it, don’t default to a team lift just because it seems faster.
If you need a ‘big heave’ or you cannot keep the resident’s movement predictable, it’s a hoist job, not a team lift.
Communication Protocol
Leader calls setup. “I’ll take the head end, you take the feet. We’ll move on three. Ready?” Both confirm. “Ready.” Leader counts. “One, two, three, lift.” Both workers move together. Stop word. Agree on a word like “stop” or “wait” that either worker can call if something feels wrong. Both workers must stop immediately if the stop word is used.
Role Clarity
Lead handler. Controls timing and makes the call if the method needs to change mid-task. Support handler. Follows the lead, provides balance or equipment stabilisation. Who watches attachments (catheters, oxygen, IV lines). Agree before you start. Who controls chair or wheelchair position. Clear roles prevent confusion and dropped loads.
| Task | Team Lift OK? | Preferred Equipment | Reason |
| Repositioning up bed with slide sheet | Yes | Slide sheet + two-person coordination | Low friction, controlled movement, shared load |
| Floor recovery after fall | No | Hoist or air-assist device (per workplace policy) | High unpredictability, potential for further injury |
| Supporting stand-pivot for cooperative resident | Yes (if care plan permits) | Transfer belt or grab rails for resident support | Resident participates, workers provide balance only |
| Lifting non-weight-bearing resident bed-to-chair | No | Mobile or ceiling hoist | High manual force, risk of sudden load increase |
Injury data shows that high-risk patient handling injuries are common when training and system controls are inadequate. Team lifts can be part of a safe system, but only when the task is appropriate, staff are trained, and communication is clear. For insights on why hands-on practical training matters in high-risk tasks, see training delivery options.
Falls Recovery and Do Not Lift Scenarios (Protecting Residents and Staff)
Do not attempt a manual floor lift unless your workplace policy and resident assessment explicitly permit it and you are trained and competent. This is a strict principle.
A falls recovery plan is a documented, step-by-step method for assisting a resident after a fall that prioritises clinical safety, equipment use, and controlled movement.
Immediate Checks
Resident response. Can they speak? Are they conscious and alert? Pain or deformity. Ask where it hurts. Look for obvious limb deformity, swelling, or inability to move a limb. Head strike suspicion. Did they hit their head? Any confusion, drowsiness, or nausea? Dizziness or weakness. Can they stand or do they feel faint?
If any red flags are present (severe pain, head strike, limb deformity, inability to weight-bear), escalate per workplace policy. This may mean calling a registered nurse, clinical lead, or emergency services (000). Do not move the resident until clinical assessment is complete.
Environmental Controls
Privacy. Use screens or move other residents if necessary. Warmth. Cover the resident with a blanket while you prepare equipment. Prevent further falls. Block off the area, remove trip hazards, ensure adequate lighting. Clear space for equipment. Move furniture to allow hoist access if needed.
Preferred Recovery Methods
Hoist from floor. If the resident is assessed as appropriate for hoisting and you have a suitable sling, use a mobile hoist. This requires two staff (minimum), a low-level sling (or one that can be manoeuvred under the resident while they are on the floor), and space to position the hoist base. Mechanical aids. Some facilities use inflatable cushions or air-assist devices to gradually elevate the resident before using a hoist. Staged approach. Help the resident roll onto their side, then to hands and knees, then to a kneeling position using a stable surface (chair or bed frame) for support. This method requires the resident to be cooperative and capable. It’s not always possible.
Avoid underarm dragging. Lifting or dragging a resident by their armpits applies high force to your back and can injure the resident’s shoulders. If you cannot hoist or use a staged approach, wait for additional help or equipment.
Documentation and Review
Every fall is a near-miss opportunity. Document what happened, the method used for recovery, equipment used, and any injuries (resident or staff). Review the incident. What changed? Should we adjust the resident’s care plan? Is equipment accessible enough? Does staffing allow safe response times? This learning loop improves systems.
| Red Flag (If Present, Call Clinical Lead/000 Per Policy) | Action |
| Head strike with confusion, drowsiness, or nausea | Do not move; monitor consciousness; escalate immediately |
| Severe pain in limb or back | Stabilise; do not attempt to move; call for clinical assessment |
| Visible limb deformity or inability to bear weight | Suspected fracture; immobilise and escalate |
| Resident on anticoagulants with any head strike | Higher risk of internal bleeding; escalate per policy |
After a fall, the safest first move is often not moving the resident at all until you’ve assessed risk and brought the right equipment and support.
Injury prevalence data reinforces the need for effective controls in care workforces. Falls recovery is one of the highest-risk scenarios. For broader context on responding to incidents, see first aid training matters in workplace safety culture.
Injury Prevention System (Early Warning Signs, Reporting, Sustainable Work Practices)
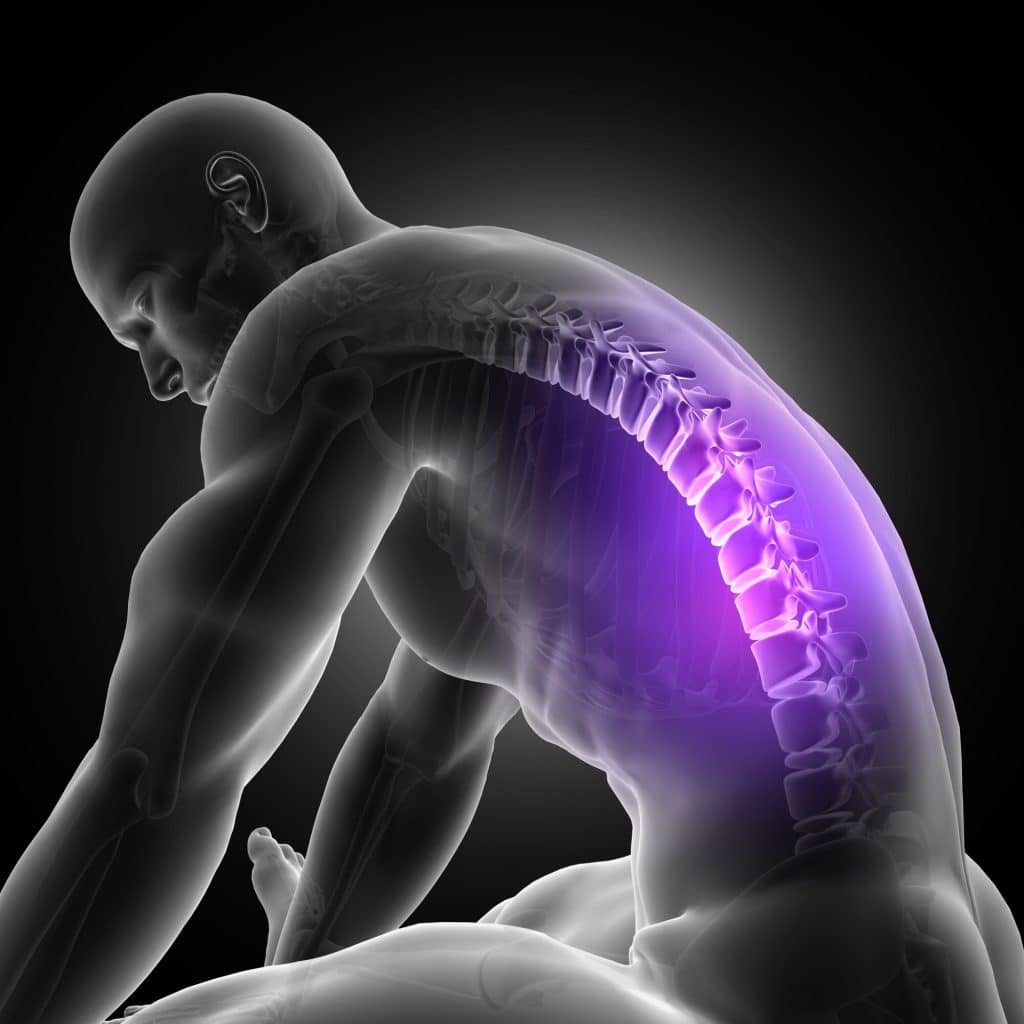
Musculoskeletal disorder risk is cumulative. One heavy lift might not hurt you. Fifty a week for five years will. Early symptom reporting matters because it allows intervention before chronic injury sets in.
Musculoskeletal disorders are injuries or disorders of muscles, nerves, tendons, joints, or spinal discs that are often caused or worsened by repetitive or high-force work.
Early Warning Signs
Persistent soreness in the back, shoulders, or neck that doesn’t resolve overnight. Tingling or numbness in hands, fingers, or arms. Loss of grip strength. ‘Twinges’ or sharp pains during transfers that weren’t there before. Stiffness after shifts that takes hours to ease.
What to do immediately. Report symptoms to your supervisor or WHS coordinator. Modify duties temporarily if possible. Review recent tasks to identify what changed (new resident, different equipment, increased shift load).
Work Design for Injury Prevention
Rotate high-load tasks across the team. Don’t assign one worker all the hoist transfers every shift. Micro-breaks between manual handling clusters. After three consecutive transfers, take two minutes to stretch or perform a different task. Avoid repeated high-force repositioning without slide sheets. If you find yourself pulling residents up the bed manually multiple times per shift, the system is broken. Get slide sheets.
Practical Warm-Up Guidance
Light movement before starting manual handling shifts can prepare muscles and joints. Gentle shoulder rolls, neck stretches, and trunk rotations increase blood flow and range of motion. Keep it simple and brief (three to five minutes). Avoid static stretching before work; dynamic movement is better. This is general guidance. Follow your workplace policy.
Culture Change
Encourage using hoists early. The mentality “we can do this one manually” leads to injury. If a hoist is appropriate, use it. Reduce stigma of asking for help. Needing a second person for a task is not weakness. It’s safe practice. Normalise reporting near-misses. “I almost dropped that slide sheet” is valuable data, not a failure.
The best injury prevention strategy is the one that changes the task (equipment, heights, layout, and staffing) so the worker does not have to rely on ‘perfect technique’ all shift.
| Symptom | Immediate Action | Task Change | Who to Notify |
| Lower back soreness after shift | Ice or heat (as tolerated), rest | Review tasks: using slide sheets? Bed heights correct? | Supervisor or team leader |
| Shoulder pain during overhead reach | Avoid overhead tasks temporarily | Adjust equipment storage height; use step stool | WHS coordinator |
| Tingling in fingers or hands | Report immediately; may indicate nerve compression | Reduce repetitive grip tasks; check wrist posture | Supervisor and WHS |
| ‘Twinge’ or sharp pain mid-transfer | Stop task; switch to hoist or get assistance | Reassess resident capability and method selection | Team leader |
MSDs dominate serious claims in healthcare. NIOSH notes that ergonomic interventions reduce physical demands of manual material handling. This evidence supports systemic change over individual ‘technique fixes’. For information on certificate renewal cycles and maintaining competence, see certificate validity expectations in Australia.
Competency Checklist (Worker) and Audit Checklist (Supervisor)
These checklists support supervision and consistency, but do not replace workplace policy. Adapt them to your organisation’s specific procedures and equipment.
Competency means you can consistently perform a task safely in real conditions, not just explain the theory.
Worker Competency Checklist
| Competency Element | Observed/Demonstrated | Date | Assessor |
| Risk assessment performed before transfer (resident, task, environment, equipment) | ☐ | ||
| Environment set correctly (heights adjusted, brakes locked, space clear) | ☐ | ||
| Correct equipment chosen and inspected (sling size, hoist type, slide sheet condition) | ☐ | ||
| Communication used (explained task to resident, coordinated with team member) | ☐ | ||
| Transfer completed with control (no sudden movements, resident comfortable) | ☐ | ||
| Post-transfer checks completed (resident comfort, skin integrity, attachments secure) | ☐ | ||
| Can identify when to stop and escalate (red flags, equipment issues, resident distress) | ☐ |
Supervisor Audit Checklist
| Audit Item | Compliant (Y/N) | Notes/Action Required | Review Date |
| Equipment availability (hoists, slide sheets, slings accessible on each shift) | ☐ | ||
| Sling inspection process in place (who checks, how often, documentation) | ☐ | ||
| Incident review cadence (falls, near-misses reviewed within 48 hours) | ☐ | ||
| Refresher training schedule (annual or per organisational policy) | ☐ | ||
| Spot checks conducted (random observation of transfers, feedback provided) | ☐ | ||
| Staff can demonstrate competency when asked (explain method, equipment choice) | ☐ | ||
| Care plans reflect current resident mobility and equipment recommendations | ☐ |
Structured approaches improve observed skills. In RAISE program trials, competency demonstration improved significantly after implementing clear frameworks. Checklists translate theory into measurable action.
In aged care, competency is demonstrated when a worker can choose the safest method, set up the environment, and complete the transfer with control every time.
For foundational safety training that complements manual handling skills, see first aid basics as a related pathway for new staff.
Best Manual Handling Course QLD for Healthcare and Aged Care (What to Look For in HLTWHS005)
‘Best’ depends on your role and workplace. But quality markers are consistent.
HLTWHS005 is the nationally recognised unit of competency that covers identifying hazardous manual tasks, preparing for manual tasks, using safe handling techniques and mechanical aids, and contributing to safe work practices.
Non-Negotiables
Nationally recognised HLTWHS005 delivered by a Registered Training Organisation (RTO). Clear competency-based assessment process (not just attendance). USI (Unique Student Identifier) requirements explained up front. Statement of Attainment or certificate issued promptly after successful completion.
Aged Care Relevance
Practical time on slide sheets, hoists, and transfer scenarios. Not just watching a video. Hands-on assessment where you demonstrate resident transfers with supervision. Discussion of confined spaces (bathrooms, bedrooms) and toileting transfers, which are high-risk in aged care. Risk assessment methods taught and practiced, not just mentioned.
Delivery Fit
Blended learning (online theory + face-to-face practical) is common. Face-to-face is preferable for the practical component because hoist operation and team coordination cannot be fully assessed remotely. Hands-on assessment matters. You should physically operate a hoist, position a sling, and demonstrate a slide-sheet repositioning under supervision.
Refresher Expectations
HLTWHS005 does not have a universal expiry date mandated by national training law. But many employers expect refresher training every one to two years. This is employer practice, not legal requirement. Refreshers keep skills current as equipment and residents change. Ask prospective training providers about refresher options and group booking discounts.
Procurement Checklist
Class size. Smaller groups (8 to 12 participants) allow more hands-on time per person. Trainer currency. Does the trainer have current aged care or healthcare experience, not just generic manual handling credentials? Equipment list. Ask what hoists, slings, and slide sheets will be used during training. Do they match what your facility uses? On-site training availability. Can the RTO deliver training at your facility using your equipment? This improves transfer of learning. Cancellation policy and transparent pricing. No hidden fees.
CPR First Aid as Your Preferred Provider
CPR First Aid delivers HLTWHS005 training built around workplace-ready outcomes. The organisation publishes practical safety guidance (like this article) and understands the real constraints aged care workers face: time pressure, variable resident needs, and equipment access challenges. Training is healthcare-contextualised, not generic warehouse lifting.
Patient lifting devices reduce back loading, which is why equipment-first training matters. Structured programs improve observed skills when they include practical demonstration and feedback. For more on manual handling training tips, CPR First Aid’s resource library supports ongoing learning beyond initial certification.
Frequently Asked Questions
What is manual handling in aged care?
Manual handling in aged care is any task where you use force to move or support a resident or load, including transfers, repositioning, and mobility assistance. Common examples include bed-to-chair transfers, repositioning residents up the bed, chair-to-toilet assistance, showering support, and helping residents stand or sit. It becomes hazardous when it involves high or sudden force, awkward postures, repetition, or unpredictable movement (like when a resident loses balance mid-transfer). Risk factors specific to aged care include variable resident mobility, cognitive impairment affecting cooperation, confined spaces (bathrooms, bedrooms), and time pressure during toileting or incident response.
How do I know if I should use a hoist?
If the resident cannot reliably weight-bear or follow instructions, or the movement could be unpredictable, use a hoist or mechanical aid as the first option. Check the resident’s care plan for transfer method recommendations. Assess their current state: can they push up with their legs today? Are they cooperative and alert? If there’s any doubt, choosing the hoist is safer than attempting a manual or team lift. Other indicators include recent falls, unsteady gait, pain during movement, or if the transfer environment is cramped. Always follow manufacturer instructions for sling selection and attachment. If sling fit or compatibility is uncertain, stop and get a competent check before lifting.
Is HLTWHS005 mandatory for aged care workers in QLD?
HLTWHS005 is not universally ‘mandatory’ by name, but Queensland workplaces must ensure workers are trained and competent to perform hazardous manual tasks safely, and HLTWHS005 is a common way employers evidence that competency. The Work Health and Safety Act 2011 and associated regulations require that workers receive appropriate training and instruction. Many aged care employers specify HLTWHS005 in position descriptions or onboarding requirements because it provides a standardised, nationally recognised competency framework. Completing HLTWHS005 through an RTO demonstrates you have been assessed on risk identification, equipment use, and safe handling techniques. If you’re entering aged care work or changing employers, confirm their specific training requirements during the recruitment process.
How long does a manual handling certificate last?
HLTWHS005 does not have a single national expiry date, but many aged care employers require refresher training every one to two years to keep practices current. This is workplace policy, not a legal expiry built into the qualification itself. The rationale for refreshers includes equipment changes (new hoist models, updated slings), staff turnover creating gaps in team knowledge, incident learnings that require updated procedures, and skill fade over time. Some organisations tie refresher schedules to annual competency reviews or WHS audits. Ask your employer or prospective employer about their refresher expectations. If you’re selecting training for a team, consider providers who offer discounted refresher sessions or annual review packages.
What are the most common manual handling injuries in aged care?
The most common injuries are musculoskeletal disorders such as back, shoulder, and strain or sprain injuries linked to forceful or awkward transfers. Lower back pain dominates, often from repeated lifting, bending, or twisting during bed-to-chair transfers and repositioning tasks. Shoulder injuries occur from reaching overhead, pulling residents up the bed, or supporting sudden weight shifts. Neck strain can result from awkward head positions during confined-space transfers. MSDs account for approximately 68% of serious claims in the healthcare sector. Early warning signs include persistent soreness that doesn’t resolve overnight, tingling in hands or arms, loss of grip strength, and ‘twinges’ during transfers. Report symptoms early. MSD risk is cumulative. Small strains add up over weeks and months into chronic injury.
Are team lifts safer than lifting alone?
Team lifts can reduce individual strain, but they are not automatically safe. If the load is unpredictable (like a falling person or a resident who may suddenly bear down), a hoist or mechanical aid is usually safer. Two workers sharing a manual lift of a non-weight-bearing resident still exposes both to high force. Communication breakdowns during team lifts can lead to dropped loads or unequal weight distribution, increasing injury risk for one worker. Team lifts are appropriate for short repositioning tasks with slide sheets, supporting cooperative weight-bearing residents during stand-pivot transfers, or stabilising equipment during a hoist transfer. Use a clear communication script: leader confirms setup, both workers confirm readiness, leader counts, and both move together. Agree on a stop word that either worker can call immediately if something feels wrong.
What should a good manual handling course in QLD include for aged care?
A good QLD manual handling course should include supervised practice on real aged care scenarios using slide sheets and hoists, plus risk assessment and reporting skills aligned to HLTWHS005. Look for practical time with equipment, not just theory slides. You should physically operate a hoist, select and attach slings, and demonstrate slide-sheet repositioning under trainer observation. Scenarios should reflect aged care tasks: bed-to-chair transfers, toileting assistance in confined bathrooms, and in-bed repositioning. Assessment should be competency-based, meaning you demonstrate the task and receive feedback. Trainers should have current healthcare or aged care experience. Class sizes should be small enough (8 to 12 participants) for hands-on practice. Ask if the RTO offers on-site delivery using your facility’s equipment, which improves immediate transfer of learning. Verify the provider’s RTO registration and HLTWHS005 scope on training.gov.au before enrolling.
Conclusion
Manual handling in aged care is not a one-off training tick-box. It’s a daily practice that requires planning, equipment, teamwork, and systems that prioritise worker and resident safety. The evidence is clear. Equipment reduces force. Structured risk assessment improves decision-making. Training works when it’s practical, assessed, and refreshed regularly.
Queensland aged care workers deserve workplaces where safe transfers are the norm, not the exception. This starts with understanding risk, using hoists and slide sheets early, and choosing HLTWHS005 training that builds real competency on real tasks. CPR First Aid supports this goal by delivering healthcare-contextualised manual handling courses that go beyond generic lifting advice.
If you’re responsible for manual handling safety in your facility, audit your equipment access, review your incident data, and ensure every worker can demonstrate competency when observed. If you’re a worker experiencing early signs of strain, report it now. If you’re selecting training, prioritise providers who use real equipment and assess real scenarios.
Manual handling injuries are preventable. The tools exist. The evidence supports them. Implementation is the challenge. Make 2026 the year your facility moves from ‘we’ve always done it this way’ to ‘we do it the safest way’.
References
- Patient handling training interventions and musculoskeletal disorders – MSDs comprise ~68% of serious claims in healthcare; training alone may not prevent lower back pain without broader controls.
- Injury profiles and attitudes toward safety handling skills – High prevalence of patient-handling injuries; 76.9% of EMTs reported handling-related injuries.
- Ergonomic Guidelines for Manual Material Handling (NIOSH) – Ergonomic interventions can lower physical demands of manual tasks.
- Evidence-Based Practice Guideline to Reduce Workload from Lifting – Patient lifting devices highly effective in minimising back loading; training/advice alone unlikely to produce long-term reductions.
- Evaluation of Lift-Assist Device Efficacy – Caregiver muscle activity significantly higher in manual care than lift-assist care.
- Caring for home care workers: Health and safety hazards – Community and personal service workers had 19.2 serious claims per thousand employees (Australia, 2020–21).
- Feasibility of implementing innovative manual handling risk assessment – Observed competency improvements (physical risk assessment completion 46% to 85%) support structured programs.
- Manual Handling in Aged Care: Impact of Environment-related Interventions – Transfer performance improves with seat heights around 100%–120% of lower leg length.